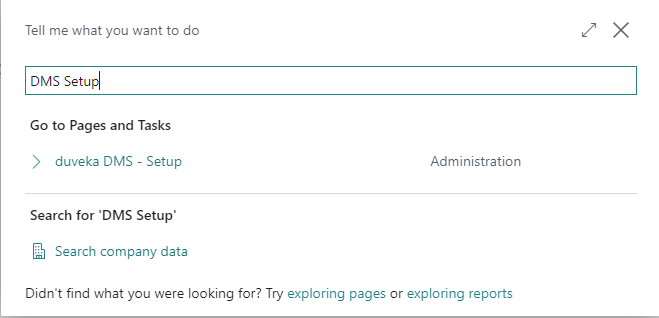
To get started, you need to select the types of documents that will
be automatically saved after printing. 1) To do this, type in search
field “DMS Setup” and open the page “DMS Setup”.
Screenshot of the search field for page
DMS Setup
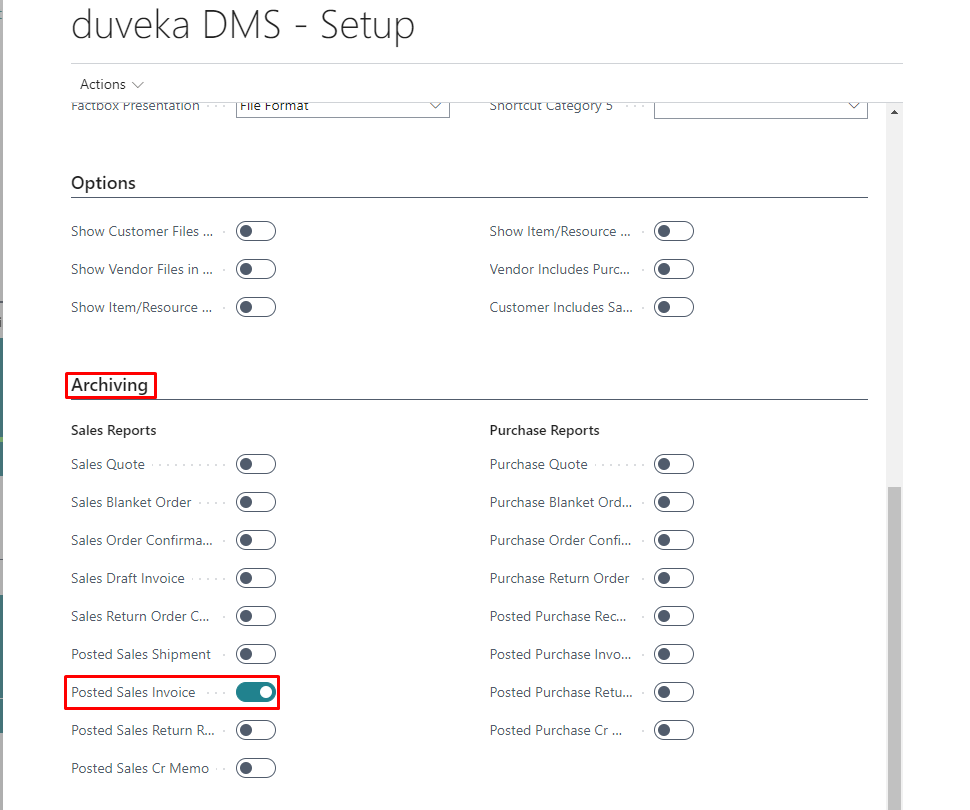
Find “Archiving” field group and select required documents. There is
Posted Sales Invoice selected as an example.
Screenshot of the page DMS Setup with
selected option for Posted Sales Invoice
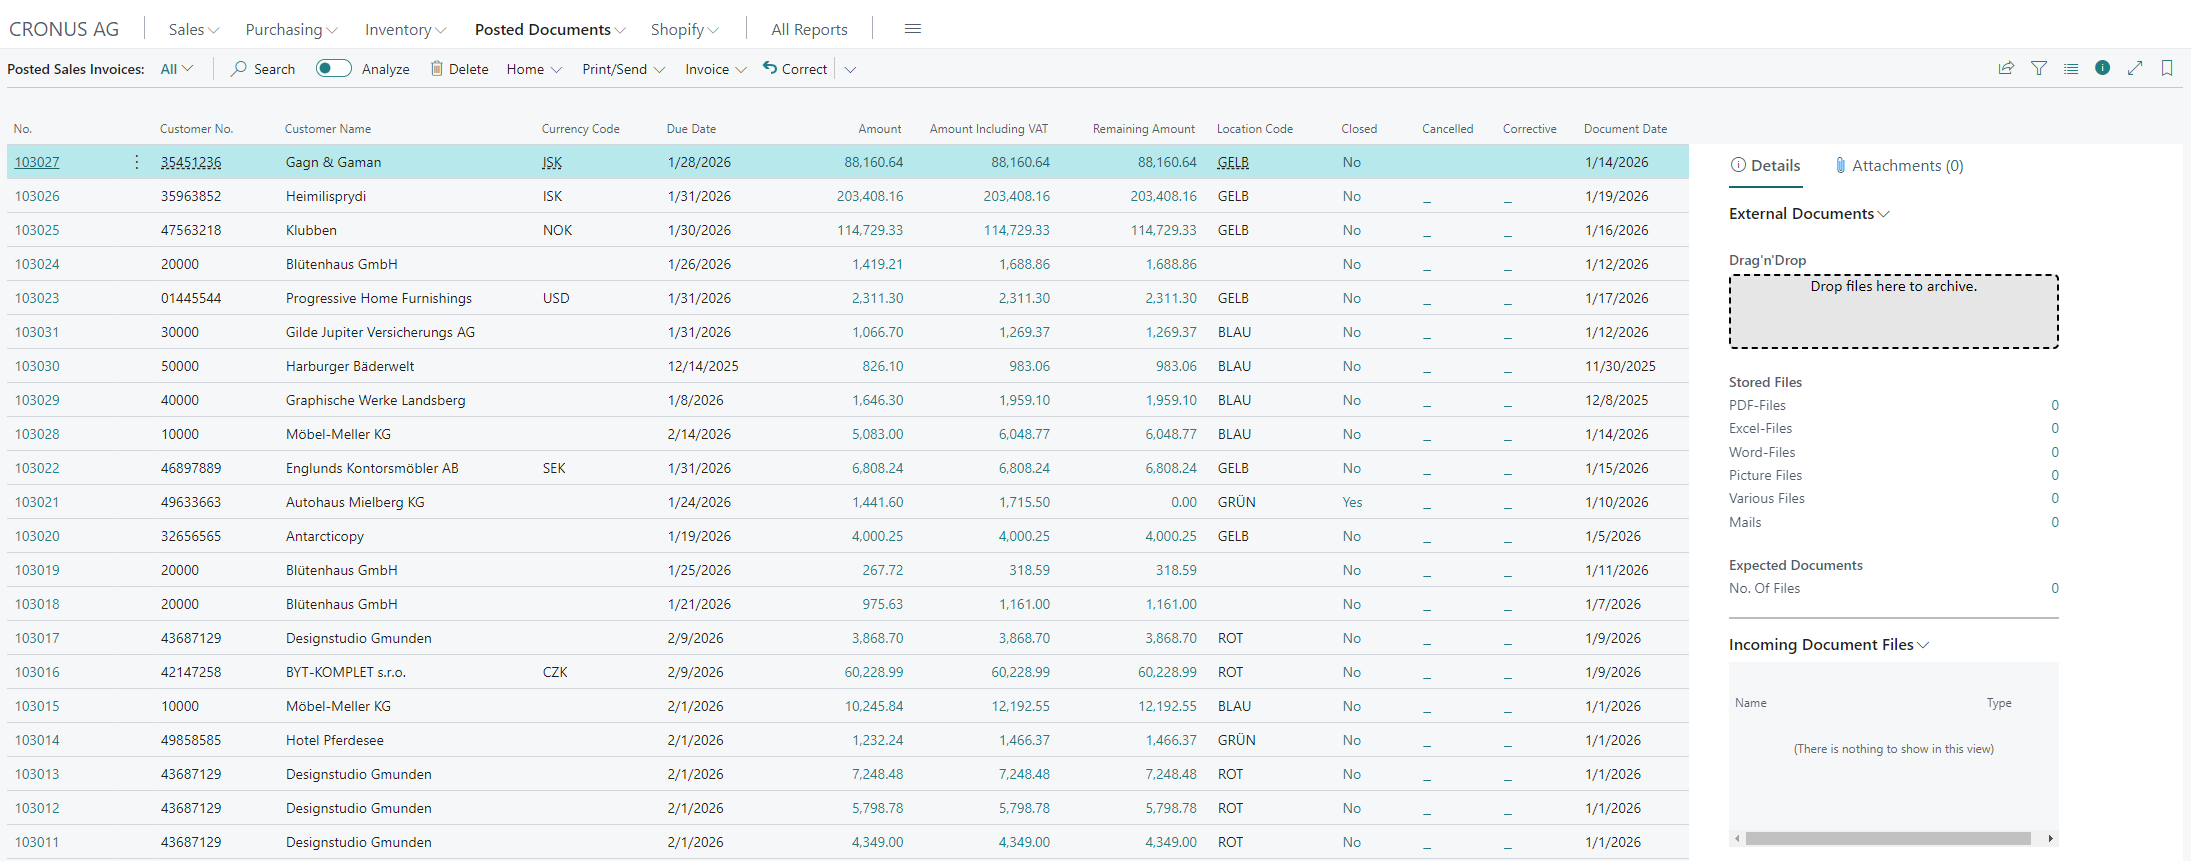
Once successfully configured, the duveka DMS can be used. 1) Open
list of Posted Sales Invoces as an example
Screenshot of the Posted Sales Invoices
list
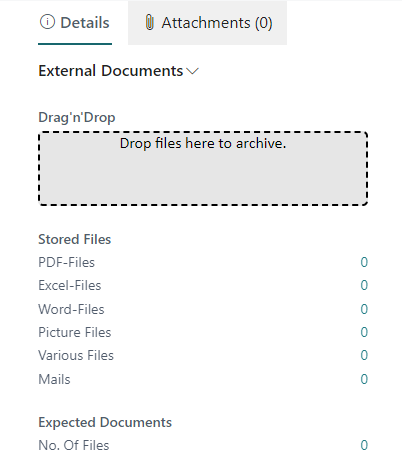
On the right side of the screen, you can see the DMS factbox
containing information about the related printed documents with the
invoice. All rows have zeros, as there are no related documents for the
selected invoice.
Screenshot of the duveka Standart factbox
from Posted Sales Invoces list
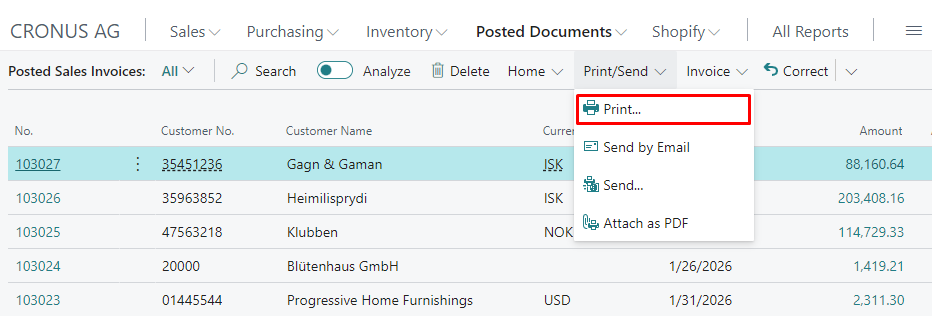
Click on the Print/Send action group on the action bar and select
Print…
Screenshot of the Print/Send action group
and Print… function
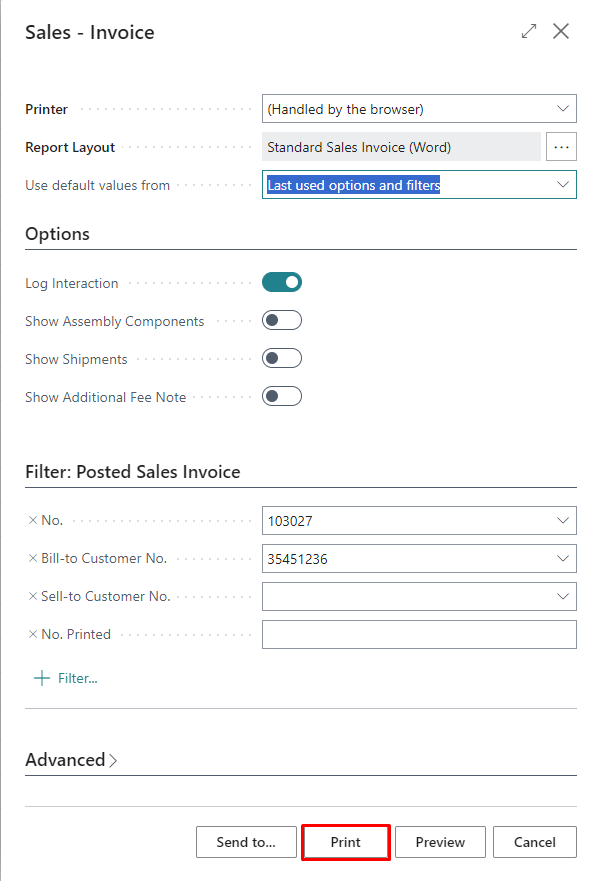
Run report printing by clicking Print
Screenshot of the Posted Sales Invoice
report request form
Close the report after printing
Screenshot of the printed Posted Sales
Invoice
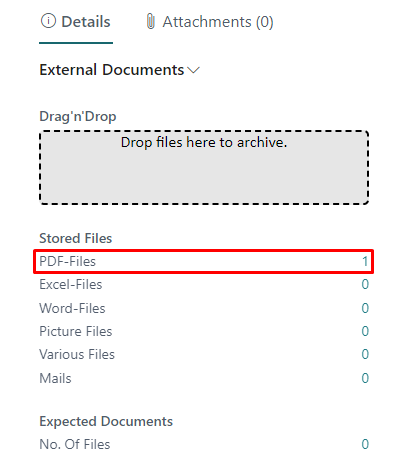
Since you have set up automatic saving of the document after
printing, the PDF-files count in the factbox has changed.
Screenshot of the duveka Standart factbox
with new value of PDF-files count
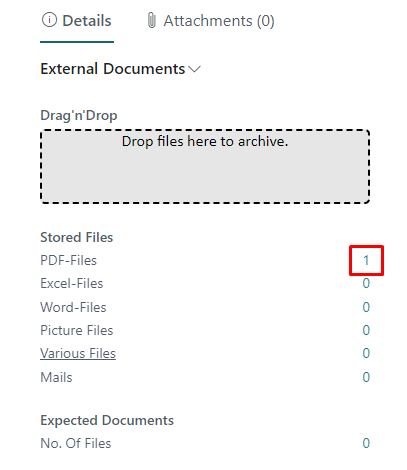
You can see the documents related to the Posted Invoice by clicking
on the number in the factbox.
Screenshot of the duveka DMS Document
List
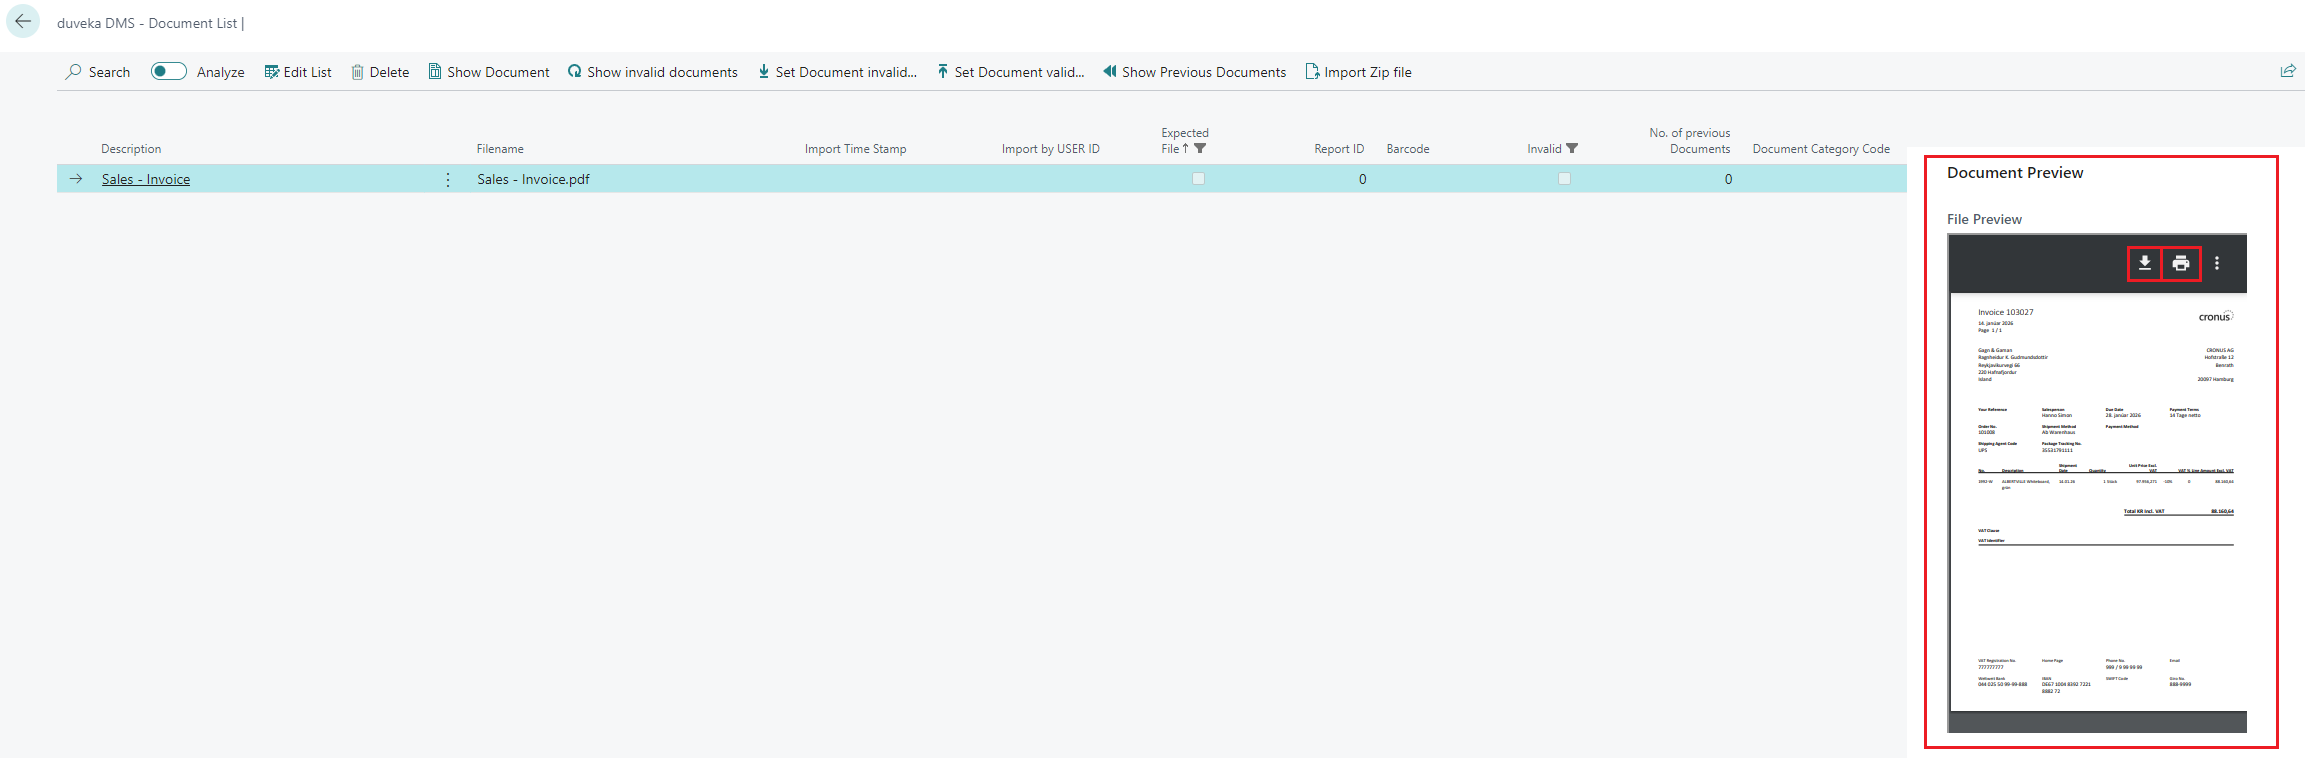
On the opened page you can see the preview of selected document in
the right side of the page. It also allows you to print or save the
document.
Screenshot of the Document preview
factbox from duveka DMS Document List
Preview feature also works with imagesand
with mails as well
Click on the action “Show document” to see the document without
printing or dowloading.
2. Import documents
using Drag&Drop feature
duveka DMS allows you to import documents by dragging it with your
cursor from another sources.
Open list of Posted Sales Invoces as an example
On the right side of the screen, you can see the DMS factbox
containing information about the related printed documents with the
invoice.
Screenshot of the duveka Standart factbox
from Posted Sales Invoces list
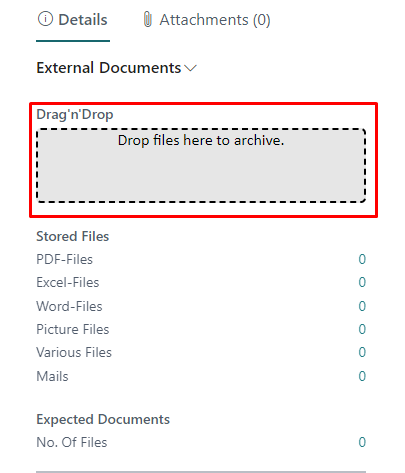
The factbox have Drag&Drop area, where you can drop your files
to import them for selected invoice:
Screenshot of the duveka Standart factbox
with Drag&Drop area
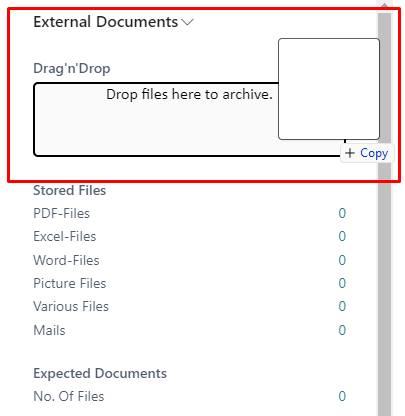
You can drag your file into the Drag&Drop area and release mouse
button when the dotted line of the area border becomes continuous.
Screenshot of the duveka Standart factbox
with Drag&Drop area with file
3. Using of “Expected
Document” feature
If you want to sign or edit printed documents from Business Central
and then store them in Business Central, you can use the “Expected
Document” feature. To get started, you need to do some configuration.
General configuration: 1) Type in search field “DMS
Setup” and open the page “DMS Setup”.
Screenshot of the search field for page
DMS Setup
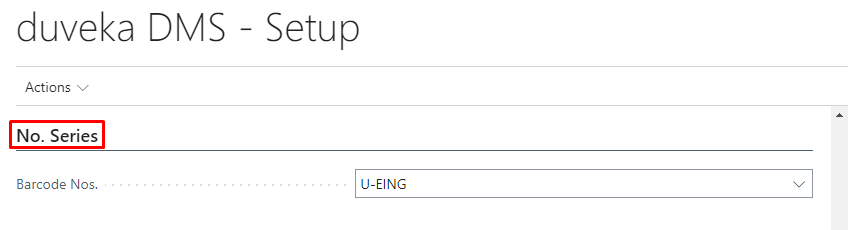
Find “No. Series” field group and select number series for Barcode
in the field “Barcode Nos”. The numbers in this series will be used to
link the edited/signed imported documents to the original documents
created when printing.
Screenshot of the page DMS Setup with the
values in fields Barcode Nos
Find “Import Documents” field group. You need to enter Barcode
Filename Mask = 111111 and Default Barcode Mask = ?????? as an
example.
Screenshot of the page DMS Setup with the
values in fields Barcode Filename Mask and Default Barcode
Mask
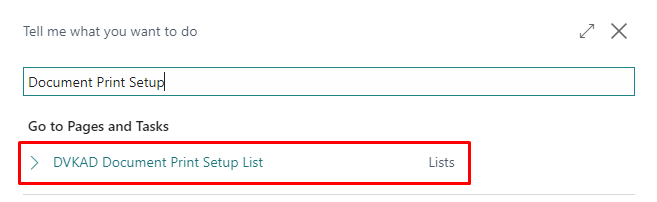
Document specific configuration: 1) Type in search
field “Document Print Setup” and open the page “Document Print
Setup”.
Screenshot of the search field for page
Document Print Setup
On opened page create a new line with the following fields: Report
ID = 1306, Enabled = Yes, Create expected Document = Yes
Screenshot of the page Document Print
Setup with created setup line for Posted Sales Invoice
report
Once successfully configured, the Expected Document feature can be
used. According to the document specific configuration, expected
documents will be created automatically after printing. In addition, you
can create an expected document manually.
Step 1. Create Expected Document automatically. 1)
Open list of Posted Sales Invoces as an example
Screenshot of the Posted Sales Invoices
list
On the right side of the screen, you can see the DMS factbox
containing information about the related printed documents with the
invoice. All rows have zeros, as there are no related documents for the
selected invoice.
Screenshot of the duveka Standart factbox
from Posted Sales Invoces list
Click on the Print/Send action group on the action bar and select
Print…
Screenshot of the Print/Send action group
and Print… function
Run report printing by clicking Print
Screenshot of the Posted Sales Invoice
report request form
Close the report after printing
Screenshot of the printed Posted Sales
Invoice
Since you have set up automatic creation of the expected document,
the number of files under Expected Documents group in the factbox has
changed.
Screenshot of the duveka Standart factbox
with new value of PDF-files count
Click the number in the factbox and see the created expected
documents related to the selected Posted Invoice.
Screenshot of the duveka DMS Document
List
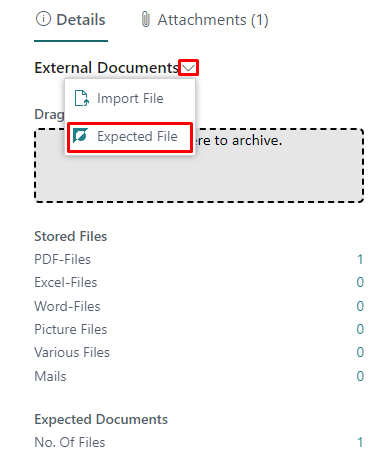
Step 2. Create Expected Document manually. 1) Go
back to the list of Posted Sales Invoces.
Screenshot of the Posted Sales Invoices
list
On the right side of the screen, you can see the DMS factbox
containing information about the related documents to the invoice.
Screenshot of the duveka Standart factbox
from Posted Sales Invoces list
Click on the External Document text in DMS factbox and click on the
action Expected File.
Screenshot of the Expected Document
action in duveka Standart factbox
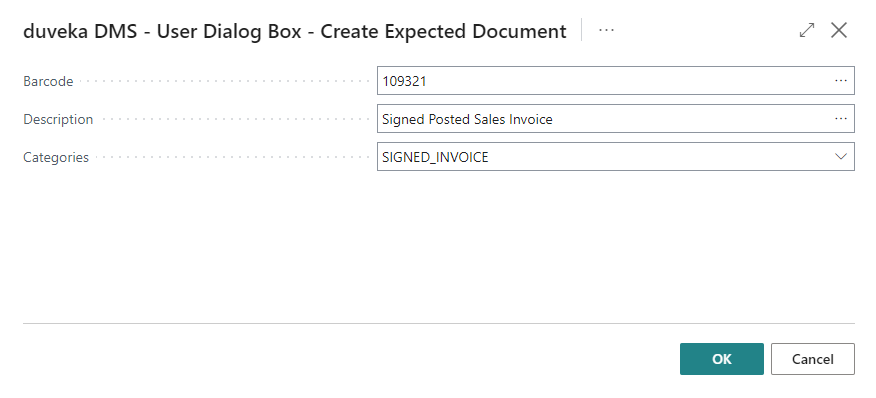
Enter the Barcode and Description values for the Expected document
and select its Category. You can use the values from the screenshot as
an example. Click OK
Screenshot of the Create Expected
Document dialog box
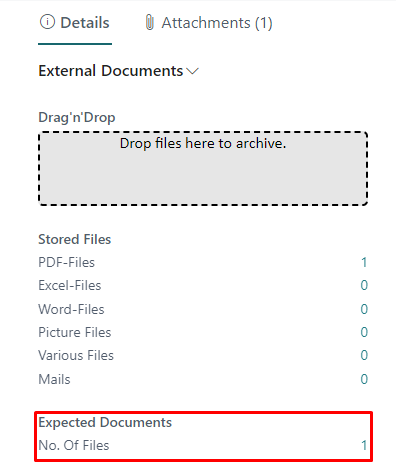
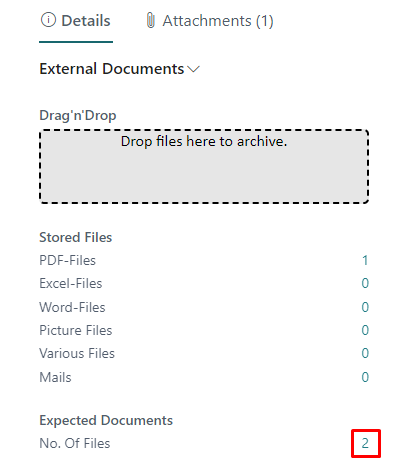
Check that No. of Files value under Expected Document group in
factbox has changed:
Screenshot of the duveka Standart factbox
from Posted Sales Invoces list with changed Expected Document
number
You can see the expected documents related to the selected Posteed
Invoice by clicking on the number in the factbox.
Screenshot of the duveka DMS Document
List
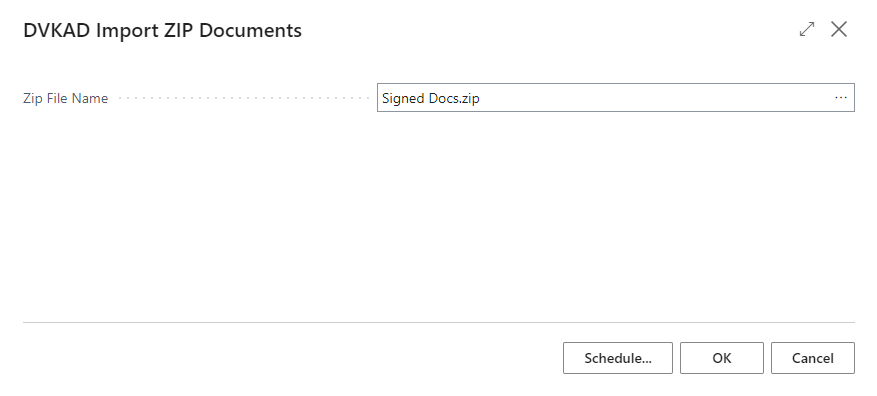
Step 3. Import edited/signed documents 1) While you
are in DMS Document List page, click on action “Import ZIP File”.
Screenshot of the Import ZIP File
action
Select prepared .zip-file with edited/signed documents and click
OK.
Screenshot of the Import ZIP File request
page
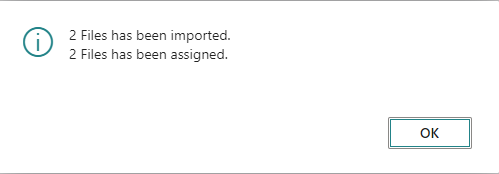
During the import process, files are assinged to existing expected
documents if barcode matches. You will see the information about
imported and assigned files when the import is finished.
Screenshot of the info message after
import is finished
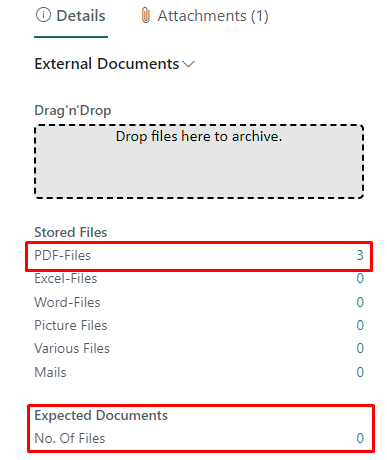
Go back to Posted Sales Invoice list and check that number of
Expected Documents in factbox become 0, and number of stored files
become 2:
Screenshot of the duveka Standart factbox
from Posted Sales Invoces list with changed Expected Documents and
Stored Files numbers
Click on the number of Stored PDF-files and find imported document
on the opened page.
Screenshot of the duveka DMS Document
List with new file
Open and Posted Documents
inheritance
Your documents and files uploaded for open documents (Orders,
Invoices, …) are also stored after the posting. The rules for moving
documents after posting are described below.
Sales Documents: 1) Sales Quote -> Sales Order 2)
Blanket Order -> Sales Order 3) Sales Order -> Posted Sales
Shipment 4) Sales Order -> Posted Sales Invoice 5) Sales Credit Memo
-> Posted Sales Credit Memo 6) Sales Return Order -> Posted Return
Receipt
Purchase Documents: 1) Purchase Quote -> Purchase
Order 2) Blanket Order -> Purchase Order 3) Purchase Order ->
Posted Purchase Receipt 4) Purchase Order -> Posted Purchase Invoice
5) Purchase Credit Memo -> Posted Purchase Credit Memo 6) Purchase
Return Order -> Posted Purchase Return Shipment
Assembly Documents 1) Assembly Quote -> Assembly
Order 2) Assembly Order -> Posted Assembly Order
Archiving Documents 1) Sales Quote -> Archived
Sales Quote 2) Sales Blanket Order -> Archived Sales Blanket Order 3)
Sales Order -> Archived Sales Order 4) Sales Return Order ->
Archived Sales Return Order 5) Purchase Quote -> Archived Purchase
Quote 6) Purchase Blanket Order -> Archived Purchase Blanket Order 7)
Purchase Order -> Archived Purchase Order 8) Purchase Return Order
-> Archived Purchase Return Order

and with mails as well